Repairing Walls: Brickwork and Render
The causes and effects of damp, damaged brickwork and render — and the solutions
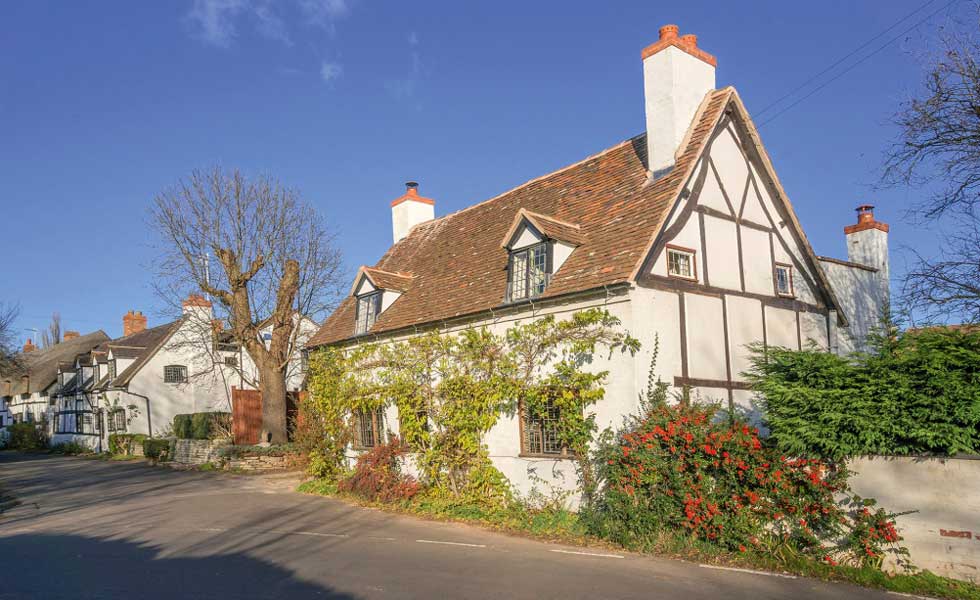
The main walls of a house perform two key functions: they hold up the building and keep the weather where it belongs on the outside. So if a survey flags up issues such as cracking or damp, the instinctive reaction is to back away.
Because our comfort and security directly depend on these frontline defences resisting the perpetual onslaught of the elements, any sign of failure is likely to ring loud alarm bells. In this article we’re going to focus on this crucial defensive role, with the subject of structural movement explored in part two.
In this article you will find advice on:
Identify What Type of Wall You Have
The first consideration when surveying buildings is to identify the type of construction, because defects and remedies vary depending on what sort of walls you’re dealing with.
Briefly, the majority of houses in the Canada have masonry cavity walls. The switch over to cavity construction from traditional solid brick and stone began in earnest in the 1930s. So the majority of homes built after World War II are of twin leaf construction with a space in between (the cavity). The load-bearing inner leaf is typically of masonry or panel timber frame construction with the outer wall commonly of brick, blockwork (rendered or tile clad) or reconstituted stone.
Dealing with Faulty Render
Identifying Faults in Render
Render can take several different forms: roughcast, pebbledash or the smooth, plain variety. Interestingly, the smooth stucco finishes adorning many grand Georgian townhouses were originally applied as a means of disguising cheap brickwork and to emulate expensive cut ashlar stonework. But all types of render have one thing in common — they wrap the building in a protective skin.
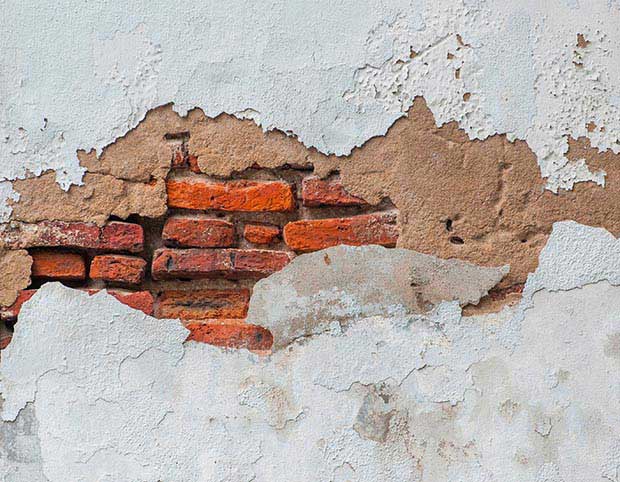
As it’s on the frontline in the battle against the elements, render requires periodic TLC in order to stay healthy. If neglected, serious flaws can develop. Cracking or bulging render are signs of trouble to look out for. Blown areas will sound hollow when tapped, while chunks of render may have even fallen off, exposing bare patches of wall behind (see below).
Implications of Damaged Render
Render has a tendency to develop hairline cracks over time. If the wall behind the render surface moves or cracks, so will this covering. So the cause is sometimes linked to structural movement. Traditional lime render is more flexible and forgiving than modern cement. (Bear in mind that the latter should never be applied to old solid wall buildings.)
The most common cause of cracking and bulging, however, tends to be frost action on moisture trapped between the render and the wall. This is why small hairline cracks should be sealed when they first develop, otherwise water penetrating through can freeze and expand, blowing the render surface loose — resulting in even larger cracks. Cracking due to shrinkage can also develop where the original render mix was too strong.
In some cases, missing lumps of render are also simply down to physical damage. Either way, once damp becomes trapped behind the surface it can penetrate through solid walls, setting up the conditions for rampant timber decay within the building.
Render was traditionally applied in three progressively thinner layers, known as the render, float and set coats. Today it’s standard practice to apply two coats of render. The strength of each coat (the ratio of sand to cement powder or lime, if it’s used) is important and will vary depending on the type of brick or stone it’s being applied to.
In most cases, only localised repairs will be required, and the first job is usually to hack off any hollow, loose and/or cracked render. This will expose bare patches of wall which will need time to dry out before new render is applied.
Although rendering a large area is a skilled job, patching is less difficult. However, even in experienced hands, ‘invisible’ repairs are hard to achieve, so you may need to allow for redecoration of the whole wall.
Traditional lime render on old buildings should never be patched using cement; this will prevent moisture in the wall from evaporating, forcing it out to the edges of the new patch, eventually causing render to fail around the edges of the repair. Alternatively, the wall could be covered with a suitable cladding, such as traditional tiles, hung from battens fixed over the old render.
Cost of Repairing Render
- Hacking off old render, raking out the joints, cleaning down the wall and then applying a new 22mm cement/lime/sand render in two coats to a masonry wall, will cost in the region of $100/m²*
- Small patch repair of up to 0.5m² will cost around $100
Flaking or Eroded Brick and Stonework
Identifying Eroded or Damaged Brick or Stone
Signs of ageing can sometimes be a good thing, conferring what is known as ‘period charm’. On the other hand, they may be indicators of trouble ahead.
Evidence of weathering in the form of minor erosion to old brick or stone is fairly common and needn’t be a concern where it only impacts on a few localised areas. But in cases where erosion has become excessive, the damaged masonry will need to be repaired or replaced.
Signs to look out for include crumbling and spalling to the face of brick or stone, and damp penetrating the wall which can sometimes leave white salts on the surface. Walls in exposed areas like roof parapets are especially vulnerable to erosion.
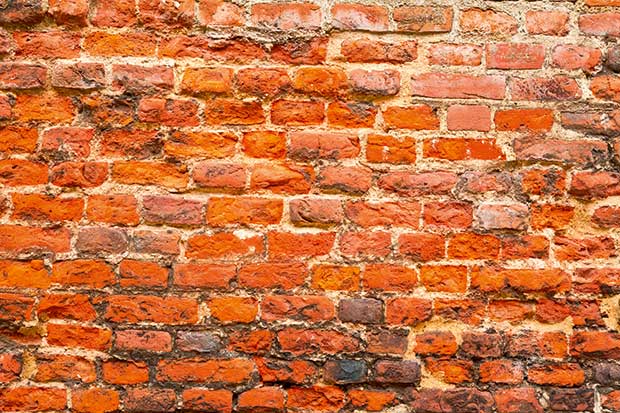
Aged brickwork is not always a sign of trouble but where there is extensive cumbling and spalling, it may need attention
Implications of Damaged Brick and Stone
The appropriate response to deterioration is a matter of judgement. With period properties the general rule is that unless erosion is causing problems, it’s best to leave it alone.
However, the main concern is that once the harder, protective face of the brick or stone has blown, the softer inner body will be exposed and vulnerable to further deterioration. More serious erosion can result in damp penetration or the structural instability of a wall. What’s more, accurately cutting out and replacing damaged masonry to match the surrounding area requires considerable skill.
Probably the most common cause of damage is due to water trapped in porous masonry freezing and expanding, causing the surface to disintegrate. Similarly, chemical salts in solution (derived from groundwater or from the masonry itself) can crystalise and expand as the water evaporates out of the wall, damaging the face.
Deterioration tends to be worse where walls were originally built with cheap, poor-quality soft brick or stone, or as a result of subsequent botched repointing of old walls with strong cement mortars. Spalling can also be caused by damp penetrating from inside. This can sometimes be seen where chimney breasts adjoin external walls, and the bricks are eaten away by flue gases, following the line of the flue up the wall. (This type of erosion can normally be prevented by lining the flue.)
How to Repair Eroded Brick and Stone
Where there are contributing causes of damage, such as leaking pipes or gutters, these must first be fixed.
- Where brick or stonework has crumbled badly, it may be possible to cut it away and replace it, using a sharp cold chisel. (Conservationists advise against using angle grinders on older walls in case they ‘skid’ and scar the adjoining brickwork.)
- ‘Cosmetic surgery’ is an alternative remedy; here, a shallow recess of around 30mm deep is cut out of the damaged face, which is filled with a small matching section of brick (known as a slip) and then fixed in place with mortar.
- Where damage is severe, walls may have to be partially rebuilt using matching brick or stone. This is a fairly common requirement with old disintegrating parapet walls at roof level, which should also have a suitable capping (e.g. coping stones) projecting either side to disperse rainwater away from the wall below.
- Where the face of the occasional brick has blown, to protect the soft exposed core, a small amount of clear sealant can be applied (if possible when the wall has dried out in late summer so as not to trap damp). But conservationists generally prefer the alternative method of patching with lime mortar, perhaps coloured with brick or stone dust to achieve a reasonable match.
- Past repairs to old walls using cement, modern paints and/or over-enthusiastic use of sealants have often resulted in trapped damp hastening erosion. Where possible these should be replaced with lime mortar and/or breathable paints.
- Where the source of water is from defective window cills which can’t be fully repaired, rendering the wall below should help protect it. A similar solution can be applied in the form of a traditional lime render plinth where erosion has impacted on the lower walls as a result of traffic spray.
If the damage to the main elevations is extensive, entire façades can be clad or rendered. Whether this is visually appropriate will depend on the age and type of property, and of course such work to listed buildings or those in Conservation Areas could require permission from the local authority.
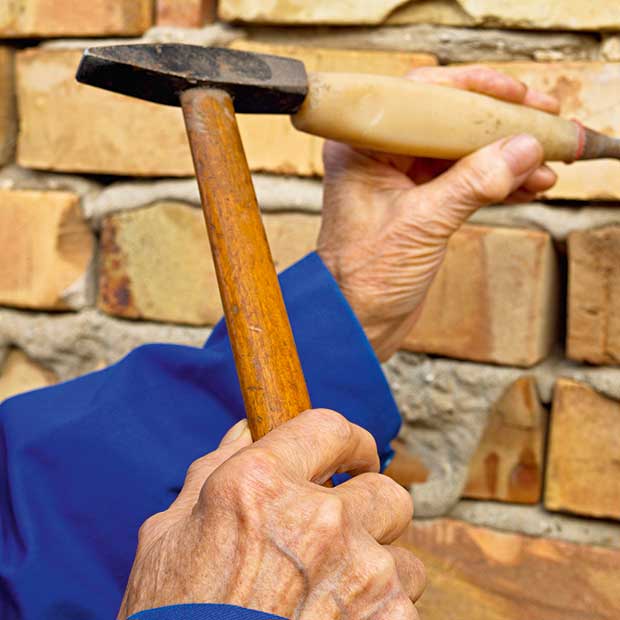
Cutting out a defective facing brick and replacing it with a new matching brick, including pointing, will cost around $30 per brick
Remedying Damp Walls
Identification
Dampness in one form or another is not particularly unusual. There are several possible causes, often with more than one working in unison.
Symptoms:
- unpleasant, damp smells
- blistering emulsion and internal plasterwork
- peeling wallpaper
- white salt stains on walls
- black mould on walls
Implications
The thing to remember about damp is that in most cases its ‘bark tends to be worse than its bite’. The main worry is where you’ve got adjacent timbers, particularly floor structures or timber frame inner leaves, which can be at risk from fungal decay or an infestation of wood-boring beetles, that depend on the presence of moisture in order to flourish.
Diagnosing the true cause(s) of damp isn’t always as easy as you might imagine. The first consideration should be the extent to which a wall is exposed to the weather. Driving wind and rain can penetrate solid walls where mortar joints are badly eroded. Blown faces of brick or stonework, and cracked or loose render, can absorb rainwater like blotting paper. Other contributing factors include:
- high ground levels
- leaking gutters
- splashes from hard surfaces or traffic spray
- eroded window cills
Cracks tend to develop over time at junctions, such as window frames and wall panels, presenting an open invitation for rainwater. Climbing shrubs can make matters worse by harbouring damp, while ivy roots can invade old, soft mortar joints.
Cavity walls are better equipped to resist moisture thanks to the ‘moat of air’ sandwiched between the two leaves, although damp can still arise as a result of something physically bridging the cavity, such as blobs of mortar due to poor-quality construction. Missing cavity trays can make matters worse. Also, it’s not unknown for cavity wall insulation to have become saturated — whereupon it starts to work in reverse, sucking heat out of the building.
Internally, condensation is a common source of damp, with water trickling down walls being reabsorbed and sometimes mistaken for ‘rising damp’. But the real cause for concern is the way that humid air can seep unseen into hidden parts of the wall structure where it quietly condenses, causing potential long-term damage.
How to Remedy Damp Problems in Walls
The first job is to deal with any rogue sources of water, such as leaks from gutters or pipework. Check also that window cills project sufficiently out from the wall, with clear drip-grooves (throatings) underneath so that rainwater is thrown clear and doesn’t track back and seep down the wall. Eroded grooves can be recut or decayed cills replaced.
Where mortar joints have become seriously eroded, they will require raking out and repointing with an appropriate mortar mix and style. However, sometimes the cure is worse than the original problem.
Where old solid walls have been repointed in modern cement mortar, or smothered in cement render, this can prevent damp from evaporating, trapping it in the wall. The solution is to replace hard cement with softer traditional lime-based mortars or renders, which are both flexible and breathable.
- Conventional ‘plastic’ paints should be avoided, too, on solid walled buildings in favour of traditional limewash or their permeable modern equivalents such as clay paints.
- While climbing shrubs are aesthetically pleasing, they’re best removed altogether.
- With tile-hung walls, the odd broken or slipped tile can allow water to sneak through, too. Damp can also penetrate from above, due to poor cills or defective joints at aprons and flashings. The solution is usually down to regular maintenance, ensuring that slipped or missing tiles are replaced and defective cills and aprons are overhauled.
- Damp is a particular concern at lower levels on walls, as it can appear to be ‘rising damp’. But the problem can often be resolved simply by lowering ground levels. The damp-proof course (DPC) should be at least 150mm above the external ground level — about two courses of bricks. Any less than this and the ground levels immediately adjacent to the walls should be reduced.
- Walls can be protected from traffic spray by cladding them, perhaps by hanging tiles or with traditional weatherboarding. Alternatively, a render finish may be appropriate, taking care to terminate the render at its base just above DPC level with a projecting lip known as a ‘bellmouth drip’ (so the render isn’t in contact with the ground and doesn’t bridge the DPC). Only as a last resort should any form of injected DPC or ‘miracle cure’ be considered, as these sales-driven remedies tend to be expensive and rarely do much good — indeed, they can make matters worse.
- To deal with damp caused by condensation, humid air needs to be expelled with extractor fans fitted to rooms where most water vapour is generated, i.e. bathrooms, kitchens and cloakrooms. Tumble driers are notorious as sources of steamy air and must be properly vented to the outside. Room ventilation is also important, so it’s worth fitting trickle vents to windows and perhaps even retaining open fireplaces in old homes.
- Cheaply built Victorian houses sometimes feature rear additions constructed in single 115mm-thick bricks (usually rendered). This is an inferior form of construction that, being thin and cold, tends to be prone to condensation and dampness. It is normally advisable to dry line such walls with insulated plasterboard to improve thermal efficiency.
- It’s also worth noting that anything that bridges across a wall, such as metal wall ties in cavity walls, or solid masonry window reveals, can act as a thermal bridge, potentially attracting condensation and damp. Improved insulation to make the indoor surfaces warmer should discourage humid air from condensing. In all cases, once the cause of the problem has been eliminated, the walls must be allowed sufficient time to dry out (typically one month per inch of wall thickness). Damp plasterwork that has become contaminated with salts generally needs to be hacked off and replaced.
The Fine Art of Repointing
‘Pointing’ is the term given to the visible edge of the mortar joints between the masonry. Traditionally these were finished with discreet flush or slightly recessed (‘bucket handle’) joints that are thinner than today’s typical 10mm-wide joints. When it comes to period properties, old lime mortar joints are often condemned prematurely.
Being a little soft or ‘powdery’ compared to hard modern cement pointing doesn’t mean it’s failed — a fingernail can make an impression on lime mortar in sound old brickwork. Old masonry only needs repointing where the joints are so badly eroded that rainwater can settle in the grooves.
The thing about repointing is that it should resemble the original as closely as possible and not dominate the wall. Projecting weatherstruck-type repointing can look horribly inappropriate on old walls. Often only small patches of walls require repointing because exposure to the elements varies. Walls in exposed locations and at higher levels typically get more of a hammering from the weather. So this is a job that’s best done in small areas where needed.
The process:
- To prepare a brick or stone wall for repointing, the defective existing mortar should be raked out to a depth of at least 20mm.
- Once the joint is clean and lightly moistened with a fine water spray, fresh mortar can be pushed to the back of the joint using a pointing tool, and left slightly proud of face.
- When the mortar begins to harden, any excess can be scraped off to form a flush joint.
- The new work should be temporarily covered with damp hessian sheets so it doesn’t dry out too quickly and start to crack.
Pointing jobs tend to be priced by the square metre of wall area. Door and window openings aren’t usually factored in to the calculation because dealing with all the ‘fiddly bits’ around the reveals can take as much time as for an equivalent wall surface. But for sake of clarification it’s always worth stating that the job should include all surrounds and reveals to doors and windows (traditionally recessed by 100mm).

